
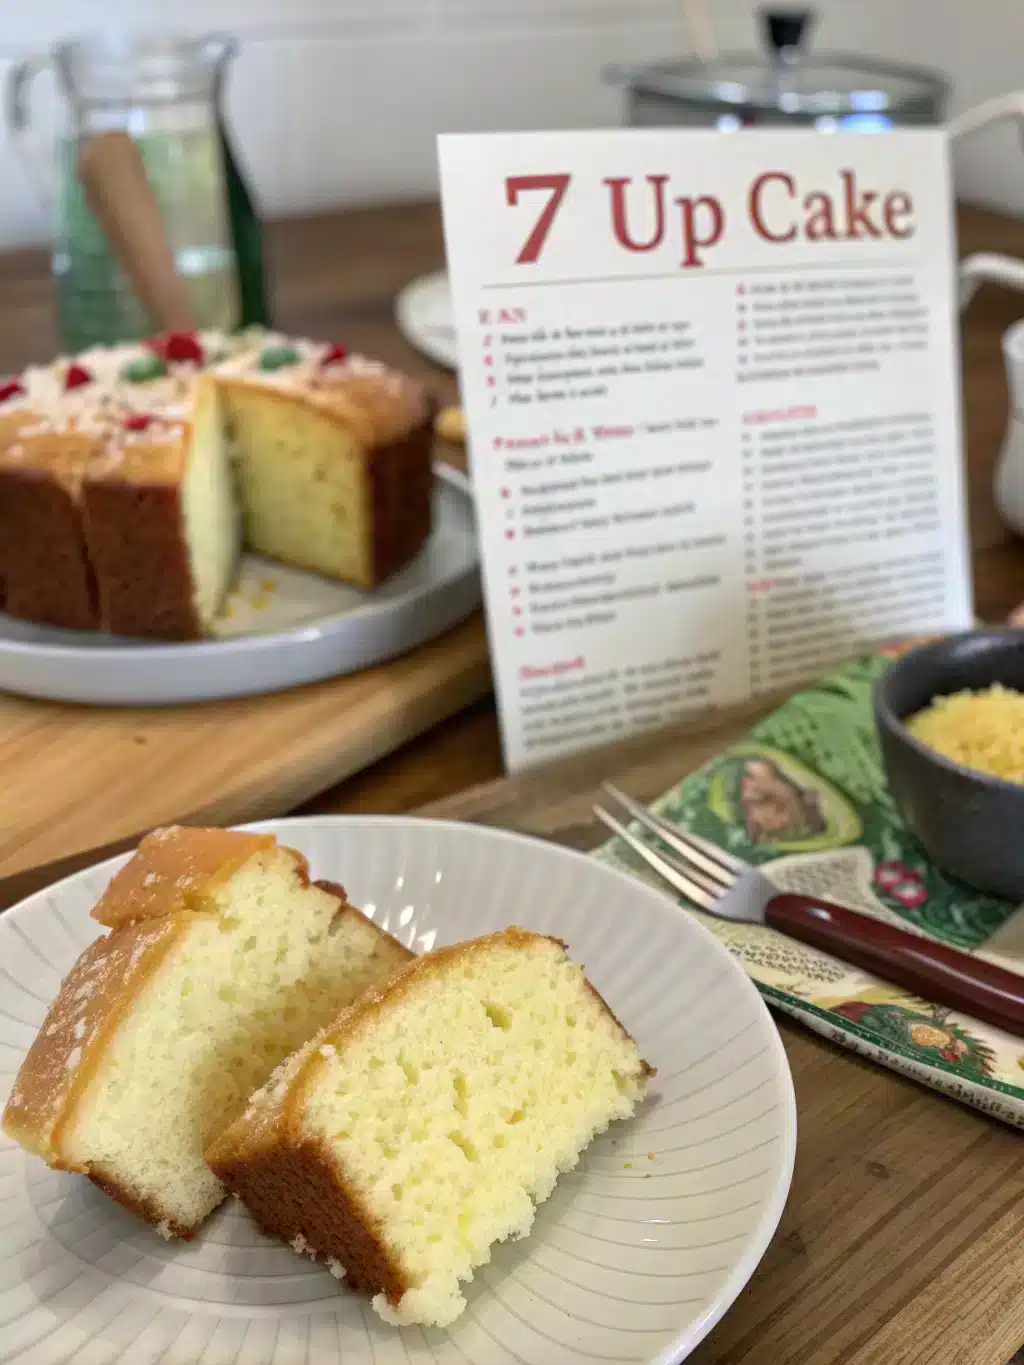
7 Up Cake Recipe
With citrusy flavor and tender crumb! So fluffy, so fresh. A retro cake that still wows!
Introduction to 7 up cake recipe
Did you know that 75% of home bakers struggle to find a cake recipe that’s both simple and impressive? If you’re craving something sweet with a refreshing twist, you’re in the right place! Today, I’m sharing an incredible 7 up cake recipe that combines the zesty flavors of lemon-lime soda with a moist, tender crumb. This delightful dessert has been a Southern classic for generations, and for good reason – it’s absolutely irresistible! With just 30 straightforward steps, you’ll create a show-stopping cake that’s perfect for any occasion. While we’re talking about classic comfort foods, you might also enjoy this Italian Meatloaf Recipe for a savory counterpart to your sweet treat.
Table of Contents

7 Up Cake
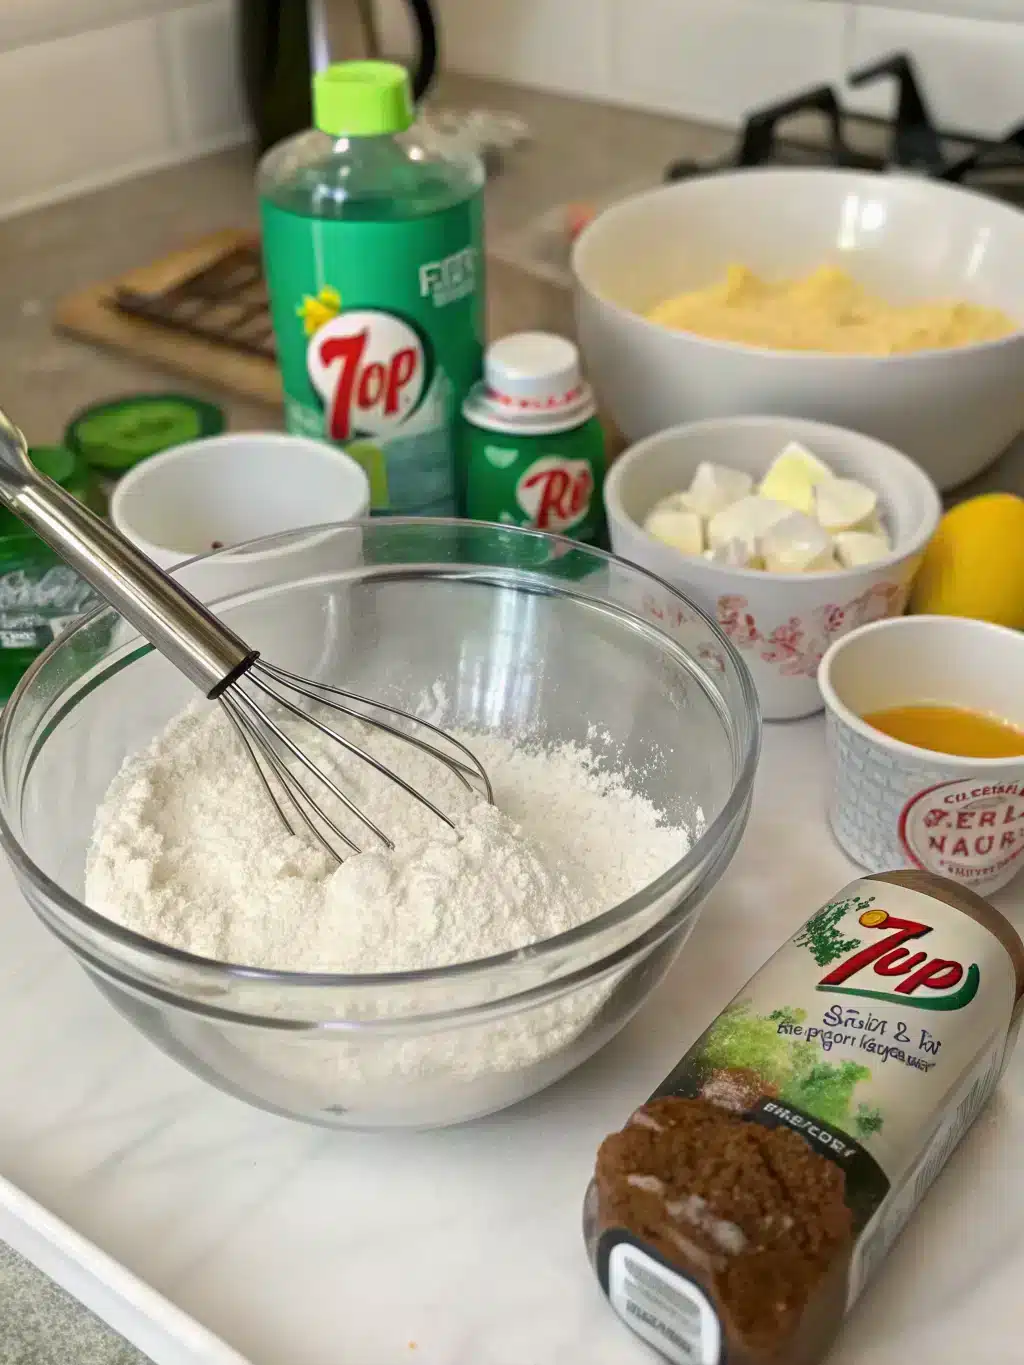
Ingredients
For the cake:
- 3 cups all-purpose flour (sifted for ultimate fluffiness)
- 3 cups granulated sugar (for perfect sweetness)
- 1½ cups unsalted butter , softened (European-style for richer flavor)
- 5 large eggs (room temperature for better volume)
- ¾ cup 7 Up soda (fresh, not flat for best results)
- 1 tablespoon lemon zest (freshly grated for vibrant flavor)
- 1 teaspoon vanilla extract (pure, not imitation)
For the glaze:
- 2 cups powdered sugar (sifted to prevent lumps)
- ¼ cup 7 Up soda
- 1 tablespoon fresh lemon juice
- 1 teaspoon lemon zest
Instructions
- Step 1: Gather Your IngredientsEnsure all ingredients are at room temperature, especially the butter and eggs. Room temperature ingredients incorporate better, creating a smoother batter and fluffier cake.Step 2: Preheat Your OvenSet your oven to 325°F (165°C). If using a dark bundt pan, reduce temperature to 315°F (157°C) to prevent over-browning.Step 3: Prepare Your Bundt PanThoroughly grease and flour your 12-cup bundt pan, ensuring you reach all the crevices. For best results, use a baking spray with flour.Step 4: Sift the FlourSift the flour twice for an incredibly light texture. This step eliminates lumps and aerates the flour, resulting in a more tender crumb.Step 5: Cream Butter and SugarIn a large mixing bowl, beat the softened butter for 2 minutes until creamy. Gradually add sugar and continue beating for 5-7 minutes until pale and fluffy. This extended creaming time is crucial for incorporating air into the batter.Step 6: Add EggsAdd eggs one at a time, beating for 30 seconds after each addition. This prevents the mixture from curdling and ensures proper emulsification.Step 7: Prepare Lemon ZestWhile beating the eggs, zest one large lemon, being careful to avoid the bitter white pith.Step 8: Add Dry IngredientsGradually add the sifted flour to the butter mixture, alternating with 7 Up (begin and end with flour). Mix on low speed to prevent gluten development.Step 9: Fold in FlavoringsGently fold in the lemon zest and vanilla extract using a spatula, not a mixer, to preserve the air bubbles.Step 10: Check Batter ConsistencyThe batter should be smooth and silky, falling slowly from a spoon. If too thick, add 1-2 tablespoons of 7 Up.Step 11: Pour Into Bundt PanTransfer the batter to your prepared bundt pan, filling it about 2/3 full. Tap the pan gently on the counter to release air bubbles.Step 12: Level the BatterSmooth the top with a spatula for even baking and to help the cake rise uniformly.Step 13: Place in OvenPosition the pan in the center of your preheated oven for optimal heat distribution.Step 14: Avoid Opening the Oven DoorResist checking your cake during the first 45 minutes to prevent temperature fluctuations that can cause sinking.Step 15: Test for DonenessAfter 60 minutes, insert a wooden skewer into the center. It should come out clean or with a few moist crumbs.Step 16: Cool in PanAllow the cake to cool in the pan for exactly 15 minutes. Any less and it might break; any more and it could stick.Step 17: Invert Onto Cooling RackCarefully invert the cake onto a wire cooling rack. If it doesn't release immediately, tap the pan gently.Step 18: Cool CompletelyAllow the cake to cool completely for at least 2 hours before glazing.Step 19: Prepare the GlazeSift powdered sugar into a medium bowl to ensure a smooth glaze.Step 20: Add Liquid to GlazeWhisk in 7 Up, lemon juice, and zest until completely smooth.Step 21: Test Glaze ConsistencyThe glaze should coat the back of a spoon and fall in a thick ribbon. Adjust with more sugar or liquid as needed.Step 22: Position Cake for GlazingPlace the cooling rack with the cake over a baking sheet to catch drips.Step 23: Apply First Glaze LayerPour one-third of the glaze slowly over the top of the cake, allowing it to drizzle down the sides naturally.Step 24: Let Glaze SetWait 10 minutes for the first layer to set slightly before adding more.Step 25: Apply Second Glaze LayerPour another third of the glaze over the cake, focusing on areas that need more coverage.Step 26: Final Glaze ApplicationUse the remaining glaze for a final coating, creating a beautiful, shiny finish.Step 27: Allow Glaze to SetLet the glaze set completely for 30 minutes before moving the cake.Step 28: Transfer to Serving PlateCarefully transfer the glazed cake to your serving plate using two wide spatulas.Step 29: Garnish (Optional)Add lemon slices, mint leaves, or edible flowers for a beautiful presentation.Step 30: Slice and ServeCut with a serrated knife, wiping the blade between slices for clean cuts.

Video
Nutritional Information
Per serving (based on 16 slices):
- Calories: 385
- Fat: 17g (Saturated Fat: 10g)
- Carbohydrates: 56g
- Sugar: 42g
- Protein: 4g
- Sodium: 35mg
- Fiber: 0.5g
This 7 up cake recipe is a treat that’s best enjoyed in moderation, with each slice providing 19% of your daily caloric intake based on a 2,000 calorie diet.
Healthier Alternatives for the 7 up cake
Create a lighter version of this 7 up cake with these modifications:
- Reduce sugar to 2½ cups (saves 30 calories per slice)
- Substitute half the butter with unsweetened applesauce
- Use diet 7 Up to reduce overall sugar content by 15%
- Replace 1 cup of all-purpose flour with whole wheat pastry flour for added fiber
- Use Greek yogurt in place of 2 eggs to reduce cholesterol
These substitutions maintain the cake’s essential flavor profile while creating a more nutritionally balanced dessert option.
Serving Suggestions for 7 up cake
Elevate your 7 up cake recipe with these serving ideas:
- Pair with fresh berries for a bright contrast to the sweet cake
- Add a scoop of vanilla bean ice cream for an indulgent treat
- Serve with lemon curd for an extra citrus punch
- Accompany with a dollop of whipped cream infused with lemon zest
- For brunch, serve with a citrus fruit salad and champagne
Common Mistakes to Avoid
According to baking experts, these are the top pitfalls when making a 7 Up cake:
- Using cold ingredients (reduces volume by up to 30%)
- Overmixing the batter after adding flour (creates a tough texture)
- Undertaking (causes sinking in the center)
- Not letting the cake cool properly (results in a sticky mess)
- Adding too much 7 Up (makes the cake too dense)
- Applying glaze to a warm cake (causes it to soak in rather than form a pretty coating)
Storing Tips for the 7 up cake
Maintain peak freshness with these storage strategies:
- Room temperature: Store in an airtight container for up to 3 days
- Refrigerator: Extends shelf life to 1 week (bring to room temperature before serving)
- Freezer: Wrap unglazed cake tightly in plastic wrap and aluminum foil; freezes beautifully for up to 3 months
- Glaze fresh: For best results, freeze the cake unglazed and add fresh glaze after thawing
FAQ
Why use 7 Up in a cake?
xYes! You can use two 9-inch round cake pans, reducing the baking time to about 35-40 minutes. Check for doneness with a toothpick.
Why use 7 Up in a cake?
The carbonation in 7 Up acts as a leavening agent, while the citrus flavor enhances the cake’s taste profile. The soda also adds a unique moisture and tenderness.
Can I make this cake ahead of time for an event?
Absolutely! This cake actually improves in flavor after a day. Make it 24 hours in advance, but add the glaze within a few hours of serving for the best presentation.
What if my cake sticks to the Bundt pan?
If your cake sticks, place a warm, damp kitchen towel over the bottom of the pan for 5-10 minutes. The steam often helps release the cake.
Conclusion
This 7 up cake recipe proves that sometimes the simplest ingredients create the most memorable desserts. With its tender crumb, subtle citrus flavor, and beautiful glaze, this cake is sure to become a favorite in your baking repertoire. The detailed 30-step process ensures perfect results every time, whether you’re a novice baker or seasoned pro. Why not gather your ingredients today and experience the joy of creating this Southern classic? Your family and friends will be impressed with both your baking skills and this deliciously nostalgic treat!,500 feet, reduce sugar by ¼ cup, add 2 tablespoons of flour, and increase oven temperature by 25°F for best results.
Tools For This Recipe
What to Serve with The 7 up cake
Did You Try Our Recipe?
We’d love to hear how it turned out! Share your experience in the comments below or Share on social media. Happy cooking!
One response
Light, moist, and full of citrusy goodness. That 7 Up really makes a difference in texture. So easy too!
Leave a Reply